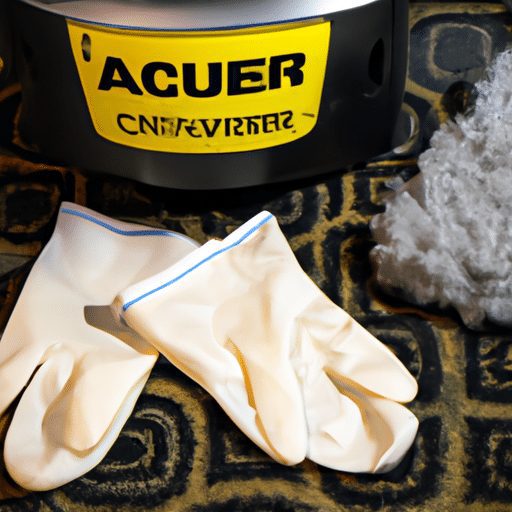
Curiosity sparked as we discovered the wonders and convenience of air fryers. As we used this revolutionary kitchen appliance, a burning question emerged: how do you clean an air fryer? In this article, we will unravel the secrets to keeping this culinary gem spotless, ensuring the longevity of your air fryer and the delectable dishes it creates. So, put on your cleaning gloves and join us as we embark on a journey to discover the best methods for maintaining the cleanliness and efficiency of your air fryer.
Removing and Cleaning the Basket and Pan
When it comes to cleaning your air fryer, the first step is to unplug the appliance and allow it to cool down completely. This is crucial for your safety and to avoid any accidental burns. Once the air fryer has cooled down, it’s time to remove the basket and pan.
The basket and pan can typically be lifted out of the air fryer easily. Take these parts to the sink and wash them in warm, soapy water. Use a mild dish detergent and a non-abrasive sponge or cloth to gently scrub away any food residue or grease. Pay special attention to any areas where food might have become stuck.
If you encounter any stubborn, stuck-on residue, soak the basket and pan in warm, soapy water for a few minutes before attempting to clean it again. This will help to loosen the residue and make it easier to remove.
After washing, rinse the basket and pan thoroughly to ensure that all the soap residue is removed. Then, dry them completely with a clean towel before reassembling them back into the air fryer.
Cleaning the Exterior and Control Panel
Just like with any kitchen appliance, it’s important to keep the exterior of your air fryer clean. To do this, start by unplugging the air fryer and allowing it to cool down.
Once it has cooled, take a damp cloth and wipe down the exterior of the air fryer. Make sure to pay attention to any areas that might have food splatters or grease stains. If you encounter any stubborn stains, you can use a mild kitchen cleaner or a mixture of vinegar and water to help remove them.
Next, move on to cleaning the control panel. Use a soft, damp cloth to wipe away any fingerprints, food residue, or grease that might have accumulated on the buttons or display. Be careful not to use too much water or cleaner, as you don’t want any liquid to seep into the control panel and cause damage.
Once you have wiped down the exterior and control panel, make sure the air fryer is completely dry before plugging it back in and using it again.
Cleaning the Heating Element
The heating element is a crucial component of your air fryer, as it is responsible for cooking your food. Over time, it can become dirty or covered in debris, which can impact its performance.
To clean the heating element, start by unplugging the air fryer and letting it cool down completely. Once cooled, take a sponge or brush and gently remove any debris or food particles that may have accumulated on the heating element. Be careful not to use anything abrasive that could scratch or damage the surface.
After removing any debris, use a damp cloth to wipe down the heating element. Make sure the cloth is not too wet, as you don’t want any water to drip into the air fryer and cause damage. Once wiped down, allow the heating element to completely dry before using the air fryer again.
Cleaning the Air Intake and Exhaust Vents
To ensure proper airflow and prevent any blockages, it’s important to regularly clean the air intake and exhaust vents of your air fryer. Start by unplugging the appliance and allowing it to cool down.
Once cooled, take a soft brush or toothbrush and gently remove any dust or debris that may be blocking the vents. Be thorough but gentle, as you don’t want to damage the fragile components.
After removing the loose debris, use a damp cloth to wipe down the vents. This will help to remove any remaining dust or grime. Make sure to dry the vents completely before plugging the air fryer back in.
Regularly checking and cleaning the air intake and exhaust vents will ensure that your air fryer operates efficiently and promotes better air circulation while cooking.
Cleaning the Power Cord and Plug
The power cord and plug are often overlooked when it comes to cleaning your air fryer, but they can collect dust, food particles, and grease over time. To keep your air fryer clean and ensure safe operation, it’s important to include the power cord and plug in your cleaning routine.
Start by unplugging the air fryer and allowing it to cool down. Once cooled, inspect the power cord for any signs of damage, such as frayed wires or exposed insulation. If you notice any damage, it’s essential to replace the power cord before using the air fryer again.
To clean the power cord and plug, use a damp cloth and gently wipe away any dust, dirt, or food residue that may have accumulated. Take care not to get the plug wet, as moisture can damage electrical components. Dry the power cord and plug thoroughly before plugging the air fryer back in.
Taking the time to clean the power cord and plug will help prolong the lifespan of your air fryer and ensure safe and reliable operation.
Removing Lingering Odors
After using your air fryer for cooking various foods, it’s common for lingering odors to develop. If you find that your air fryer has an unpleasant smell, there are simple steps you can take to eliminate it.
Start by unplugging the air fryer and allowing it to cool down. Once cooled, you can use a mixture of vinegar and water to tackle the odors. Simply pour the vinegar-water solution into the basket of the air fryer and run it at a low temperature for 10-15 minutes.
The vinegar’s acidity helps to neutralize and eliminate odors, while the steam generated by the air fryer helps to disperse the vinegar aroma. After running the air fryer, take a cloth soaked in the vinegar-water solution and wipe down the interior of the appliance, paying extra attention to any areas that may have odors trapped in them.
Remember to rinse the basket thoroughly and dry it completely before using the air fryer again. This simple method helps to freshen up your air fryer and eliminate any lingering smells.
Cleaning the Accessories
Many air fryer models come with removable accessories such as racks or skewers, which are used for different cooking purposes. These accessories can become dirty and greasy during use and need proper cleaning to maintain their performance and longevity.
Start by unplugging the air fryer and allowing it to cool down. Once cooled, remove the accessories from the air fryer and wash them in warm, soapy water. Use a mild dish detergent and a non-abrasive sponge or cloth to clean the accessories thoroughly, ensuring that all food residue and grease are removed.
After washing, rinse the accessories under running water to remove any soap residue, and then dry them completely before using them again. Properly cleaning and drying the accessories will help prevent any cross-contamination of flavors and maintain their condition over time.
Regular Maintenance Tips
In addition to the specific cleaning steps outlined above, there are some general maintenance tips to keep in mind for your air fryer.
Always unplug the air fryer before performing any cleaning or maintenance tasks. This is crucial for your safety and to prevent any electrical accidents.
When cleaning the interior and exterior of the air fryer, be sure to avoid using abrasive scrubbers or cleaners. These can damage the non-stick surfaces and reduce their effectiveness over time. Stick to mild dish detergents and non-abrasive sponges or cloths for cleaning.
It’s important to note that the air fryer and its components should not be immersed in water. Submerging the appliance can cause damage to the electrical components and may render it unsafe to use.
Regularly check and clean the air intake and exhaust vents to maintain optimal airflow and prevent any blockages. A clean ventilation system will ensure that your air fryer operates efficiently and delivers consistent cooking results.
Particular Stain or Residue Removal
Sometimes, despite regular cleaning, stubborn stains or residue may remain on the interior of your air fryer. In such cases, a specific stain removal method can help eliminate these tough spots.
Start by unplugging the air fryer and allowing it to cool down. Once cooled, make a paste by mixing baking soda and water. Apply the paste to the stained area and allow it to sit for 10-15 minutes. Baking soda is a natural cleaning agent that helps to break down and lift tough stains.
After the paste has had time to work its magic, gently scrub the stained area with a soft sponge or cloth. Be careful not to use anything abrasive that could scratch the interior of the air fryer. Once the stain has been lifted, wipe away the paste with a damp cloth and dry the air fryer thoroughly.
This targeted stain removal method can help tackle even the most stubborn residue and restore the pristine condition of your air fryer.
Always Refer to the Manufacturer’s Instructions
While this article provides comprehensive guidelines on how to clean an air fryer, it’s always important to refer to the manufacturer’s instructions for your specific model. Each air fryer may have slightly different cleaning recommendations, and it’s essential to follow these guidelines to ensure the longevity and proper functioning of your appliance.
The manufacturer’s instructions will also provide information on cleaning frequency and specific methods that are safe and effective for your air fryer model. By following the manufacturer’s guidelines, you can be confident in maintaining your air fryer correctly and enjoy delicious meals for years to come.
Cleaning your air fryer doesn’t have to be a daunting task. With these step-by-step instructions and a little bit of regular maintenance, you can keep your air fryer sparkling clean and operating at its best. So, gather your cleaning supplies and give your air fryer the TLC it needs, so it can continue to be your trusty kitchen companion.


